
Configure XCode Project Signing with xcconfig
Version: The project is built with XCode 11.3 on MacOS Mojave
XCode build configuration files, known as xcconfig, is a plaintext file that defines or overrides the configuration of a project or target. Xcconfig enables scripts to update an XCode project’s configuration and makes it easier to share configurations across projects.
This article describes configuring an XCode project’s code signing settings with xcconfig.
Code Signing Parameters
XCode code signing requires the following build settings:
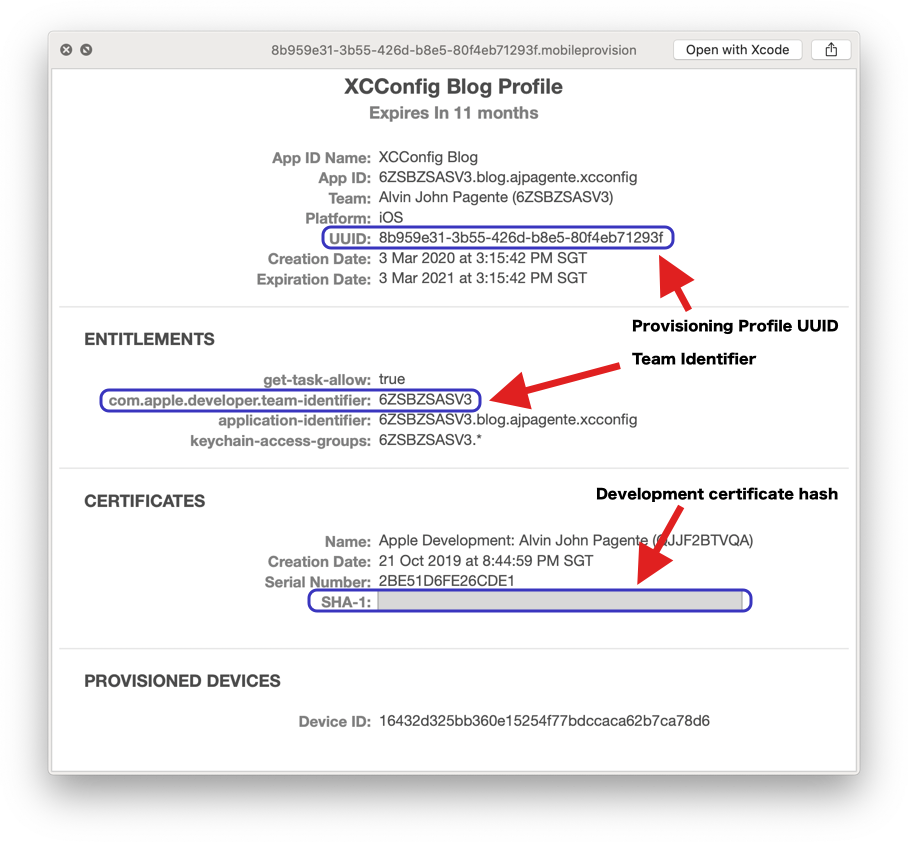
- Team Identifier
- Provisioning profile UUID
- Development certificate SHA-1 hash
If you only have one copy of a provisioning profile and development certificate on your development machine, you may use the profile and certificate name. However if there are multiple profiles and certificates, it is easy to get confused on which one to use. To mimimize mistakes and to be explicit, it is better to use UUID and hash for provisioning profile and certificate respectively.
Finding the Code Signing Parameter Values
To install and run an application on a device during development, you will need a development provisioning profile. It is assumed that you have the provisioning profile installed on your development machine. The provisioning profiles are kept in the path shown:
~/Library/MobileDevice/Provisioning\ Profiles
If you have multiple provisioning profiles, you need to look at each one to find the right development profile. You can use a text editor to view each file or an easier way is to use the Quick Look from Finder’s context menu. Right-click on the mobileprovision file and choose Quick Look. Take note of the highlighted values.
Setup an XCode Project to Use xcconfig
To use xcconfig for signing, you must perform four main tasks:
- Disable automatic signing.
- Create your xcconfig files.
- Set your build configuration to use the xcconfig.
- Update your signing settings to use the build settings from the xcconfig.
We use the XCode project named XCConfig Signing to show the setup steps.
Disable Automatic Signing
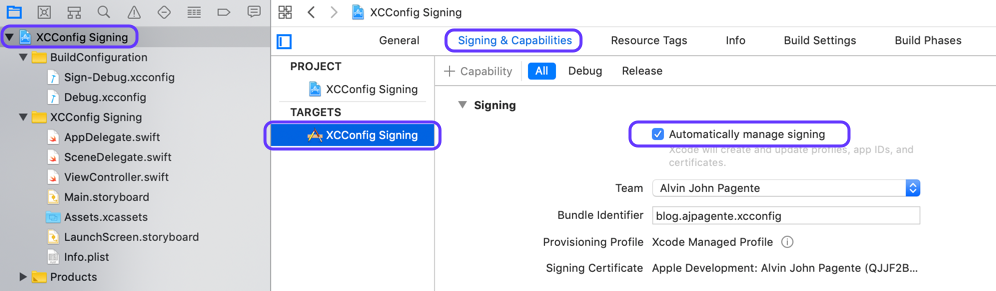
Open your XCode project, highlight XCConfig Signing in the Project navigator, then select the XCConfig Signing target. Choose the Signing & Capabilities tab, then uncheck the Automatically manage signing checkbox.
Create xcconfig Files
A personal preference is to create a folder to organize the xcconfig files. Highlight XCConfig Signing in the Project navigator, right-click then choose New Group. Name the group BuildConfiguration.
With BuildConfiguration highlighted, create a New File, choose Configuration Settings File from the template dialog window. Name the file Sign-Debug. This build configuration will hold the signing parameters for the Debug scheme.
Create another file named Debug.xcconfig to hold the Debug scheme configuration.
You may do all of this on a single build configuration file, however separating gives you the option of not checking in Sign-Debug.xcconfig to your source code repository. It is good practice particularly if you upload the project to a public Github repository.
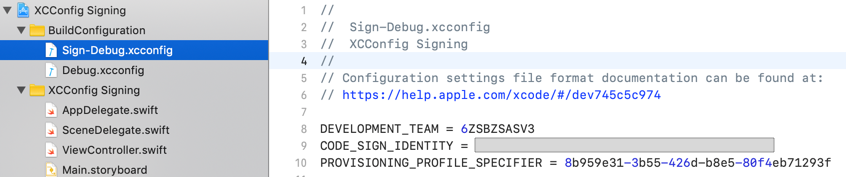
Next, edit Sign-Debug.xcconfig with the following XCode Build Settings:
- DEVELOPMENT_TEAM: The team identifier.
- CODE_SIGN_IDENTITY: The development certificate SHA-1 hash.
- PROVISIONING_PROFILE_SPECIFIER: The provisioning profile UUID.
You can refer to Apples’ Build settings reference for details on each setting.
Finally, edit Debug.xcconfig to include the signing configuration. This xcconfig feature allows configuration reuse.

You are now ready to set your build configuration.
Set XCode Configurations
By setting the Configurations to an xcconfig, XCode applies the build settings to the project. The way to set the configuration is the same for Debug and Release so only Debug will be shown here.
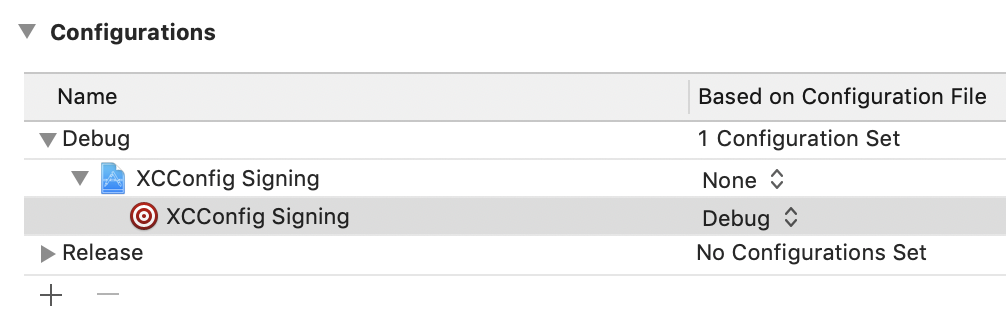
Highlight XCConfig Signing in the Project navigator, then select the XCConfig Signing target. Under Configurations, expand Debug and from the XConfig Signing target choose Debug.

The Debug configuration is set as shown.
With the configuration set to use the build settings from the xcconfig, you can now update the signing settings.
Update Signing Settings
Highlight XCConfig Signing in the Project navigator, then select the XCConfig Signing project. Choose the Build Settings tab, type signing in the search field to filter the signing settings.
The Signing settings you have to update are:
- Code Signing Identity: Set to the development certificate SHA-1 hash. There are cases such as this sample project where the code signing identify value is not automatically reflected in the field. If you have the same experience then the value has to be set as described in this section.
- Development Team: Set to the team identifier.
- Provisioning Profile: Set to the the provisioning profile UDID.

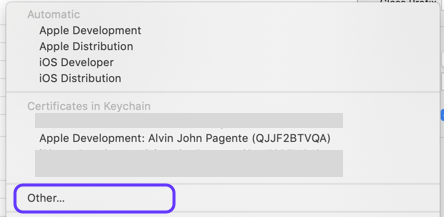
To set the fields, expand the field settings and choose Other…
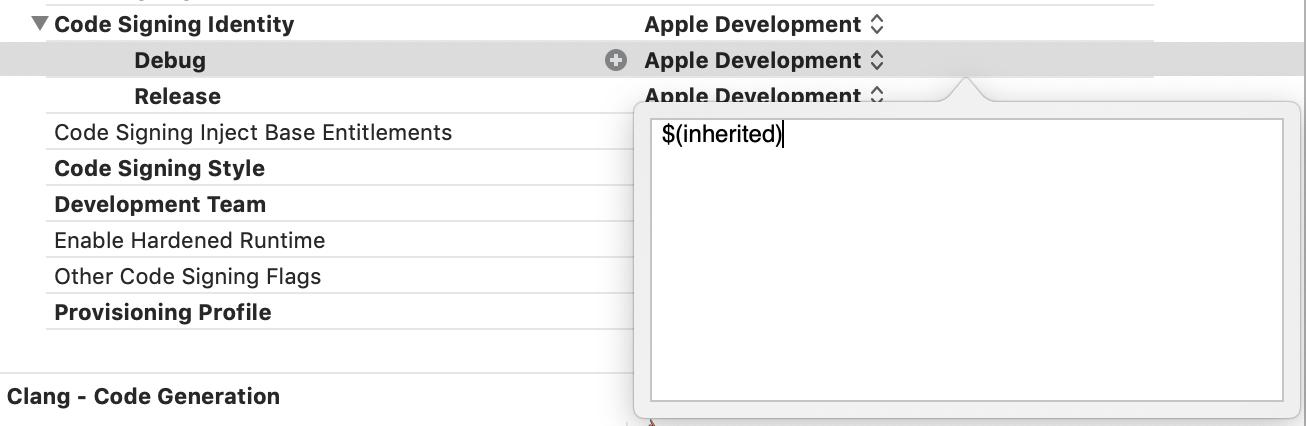
Type $(inherited) in the text field and press return.
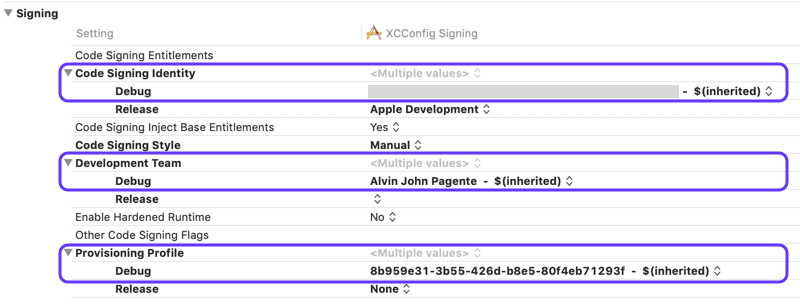
Do the same for the rest of the fields. Once done, the Debug signing settings is as shown.
Verify the Settings
To verify your signing settings, attach a device to your development Mac, choose the device as the build target in XCode, and press ⌘+B to build. A successful build confirms that the signing settings are right.
That’s it! You have configured your XCode project to use xcconfig. You can now run your app on a device. Happy developing!!!
Continue to Part 2, to learn how to generate an ipa from the command-line.